If you’ve ever searched for Minecraft Shaders, you already know the promise: turning Minecraft’s blocky world into a breathtaking, cinematic environment with realistic lighting, soft shadows, water reflections, volumetric clouds, and gorgeous post-processing effects. This guide explains what shaders are, how they work, the best shader packs in 2025, step-by-step installation methods for Java (and notes for Bedrock), performance and troubleshooting tips, and answers to the questions players most often search on Bing.
This is a practical, human-written walkthrough — no jargon-heavy fluff, just real tips you can use to pick, install, and enjoy shaders on your PC.
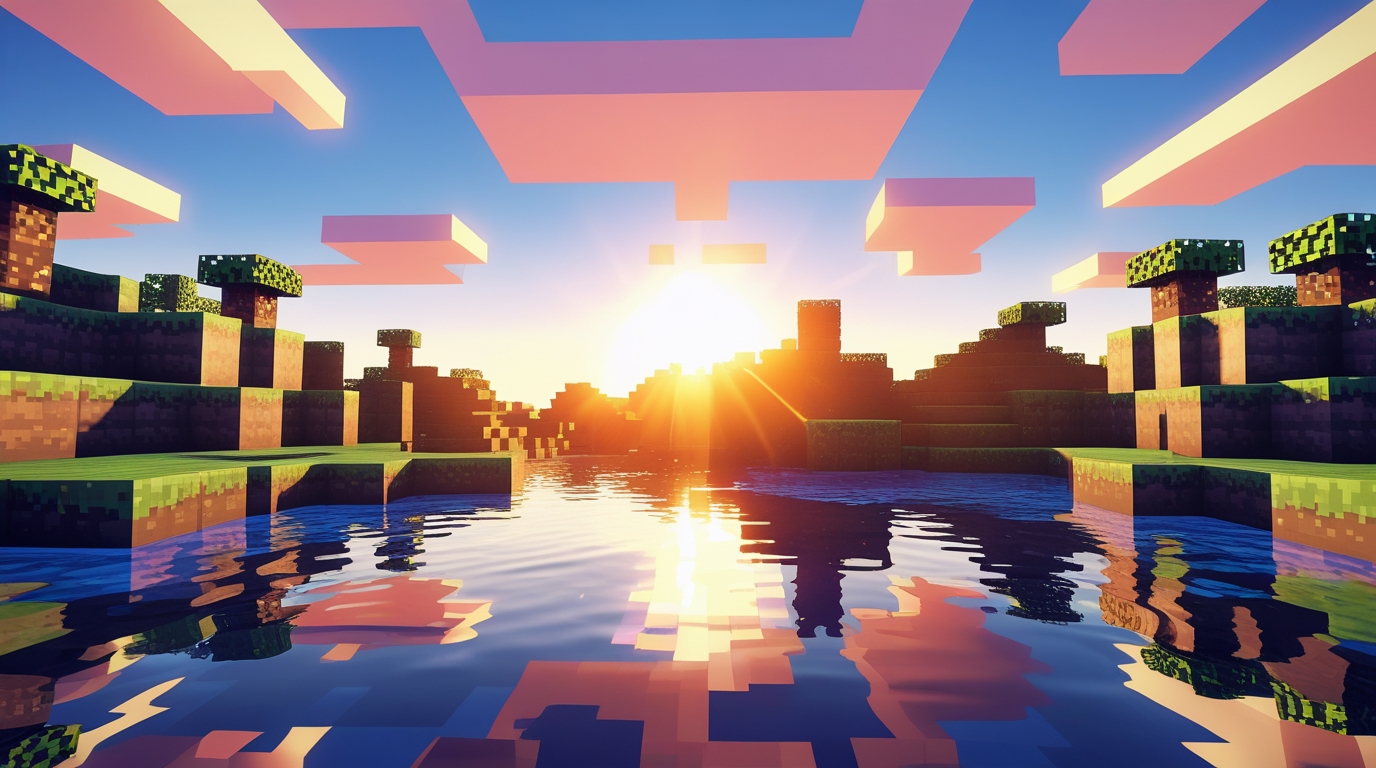
Quick overview — what are shaders?
Shaders are code bundles (shader packs) that change how the game renders light, color, and effects. In Minecraft, shader packs add:
- dynamic sunlight and soft shadows
- realistic water with reflections and refractions
- bloom, motion blur, depth of field, and color grading
- volumetric fog and god rays (light shafts)
- improved sky, clouds, and atmospheric scattering
- enhanced ambient occlusion (deeper creases and contact shadows)
In short: shaders wrap Minecraft’s graphics pipeline with modern rendering techniques so worlds look more immersive and photo-real (or stylistically enhanced).
Java vs Bedrock: where shaders work (and differences)
- Java Edition is the canonical place for shaders. Most shader packs and the ecosystem (OptiFine, Iris, Sodium) are centered on Java players. If you want gigantic mod compatibility and the largest selection of shaders, choose Java.
- Bedrock Edition (Windows 10/11, consoles, mobile) has a different rendering engine. Bedrock supports official RTX ray tracing on supported Windows systems with NVIDIA RTX GPUs and specific resource/behavior packs for ray tracing. There are also community shader-like packs for Bedrock, but the experience and installation differ significantly from Java. If you want true RTX ray tracing, Bedrock + RTX is the way to go — with the caveat that only certain hardware and the Bedrock edition support it.
This guide focuses primarily on Java Edition shaders because that’s where you’ll find the most flexible and widely supported shader packs.
What you need before installing shaders (system checklist)
Shaders can be demanding. Before you try to install heavy packs, check you have:
- Minecraft Java Edition (latest recommended, but check shader compatibility)
- A decent GPU — at minimum NVIDIA GTX 10xx / AMD RX 4xx series for light shaders; GTX 16xx / RTX 20xx or better for mid/high presets; RTX 30xx or RTX 40xx (or equivalent AMD) for high/resolution shaders or ray tracing.
- 8–16 GB RAM system memory (allocate 4–8 GB to Minecraft if you run mods/shaders)
- Modern Java (Bundled with launcher) — use the launcher’s Java or update separately if instructed by mod tools
- Updated GPU drivers — critical for stability and performance
- OptiFine or Iris + Sodium (details below) or another shader loader compatible with your setup
- Enough disk space — some shader packs and resource packs are large; an SSD helps with load times
If your machine is older or integrated-GPU based, use lightweight shader presets or vanilla improvements (like OptiFine’s basic graphical tweaks) rather than ultra-realistic shaders.
Two main shader setups for Java players
There are two common, modern approaches to running shaders on Java Edition:
1. OptiFine + Shaderpacks
- OptiFine has been the classic way to run shaders. It adds performance options, dynamic lights, and a direct “Shaders” menu. Many shader packs still support OptiFine directly.
- Pros: easy setup, built-in shader menu, many shader authors include OptiFine profiles.
- Cons: OptiFine updates may lag behind Minecraft snapshots; some players prefer alternatives for performance.
2. Iris + Sodium (and Fabric)
- Sodium replaces parts of the renderer and dramatically improves performance. Iris is a shader compatibility layer that works with Sodium, enabling most shader packs to run while maintaining Sodium’s speed boost.
- Typically paired with Fabric loader and other Fabric mods. For OptiFine-style features with modern performance, Iris + Sodium + (optional) Lithium & Phosphor is a powerful combo.
- Pros: significantly better FPS than vanilla + OptiFine in many setups, great modern modstack.
- Cons: requires Fabric loader installation and slightly more steps, some OptiFine-specific shader features might differ.
Which should you pick? If you want simplicity and broad compatibility, start with OptiFine. If you chase performance and are comfortable with Fabric, Iris + Sodium is often the faster choice.
Step-by-step: Installing shaders (OptiFine method)
- Backup worlds: Always back up important worlds before adding mods.
- Install Minecraft Java and run the version you plan to play once.
- Download OptiFine that matches your Minecraft version from the official OptiFine site (or a trusted mirror).
- Run the OptiFine installer
.jar(double-click) and choose Install. This creates a new OptiFine profile in the Minecraft launcher. - In the Minecraft launcher, select the OptiFine profile (from the version dropdown) and click Play once to ensure it loads.
- Find or create
shaderpacksfolder:- Launch Minecraft with OptiFine, go to Options → Video Settings → Shaders → Shaders Folder and click it. This opens the
shaderpacksfolder.
- Launch Minecraft with OptiFine, go to Options → Video Settings → Shaders → Shaders Folder and click it. This opens the
- Download shader pack (.zip) from the shader’s official page (never extract the
.zip). - Place the shader
.zipinto theshaderpacksfolder. - Return to Minecraft, open Options → Video Settings → Shaders, and pick your shader from the list.
- Adjust shader settings (some packs include presets like low/medium/high) and tweak OptiFine video settings for performance.
Step-by-step: Installing shaders (Iris + Sodium + Fabric method)
- Backup worlds.
- Install Fabric Loader for your target Minecraft version (download installer and run).
- Run the Fabric profile once to create folders.
- Download and install Sodium (Fabric mod) and Iris (shader compatibility) — put their
.jarfiles into.minecraft/mods/. - Optional but recommended: add Lithium and Phosphor for further performance gains.
- Launch Minecraft using the Fabric profile once.
- Create
shaderpacksfolder if Iris doesn’t create one automatically. Put shader.zipfiles into that folder. - Launch Minecraft, go to Video Settings → Shaders, and select your shader.
Note: For OptiFine features like Zoom, Dynamic Lights, or certain toggles, you can add OptiFabric mod (OptiFine compatibility on Fabric) — but this can be more involved and sometimes unstable. If you want OptiFine-only extras, choose OptiFine route.
Popular and recommended shader packs (short list & what they’re known for)
These descriptions are concise — try a few to find the aesthetic you love.
- SEUS (Sonic Ether’s Unbelievable Shaders) — extremely polished lighting, realistic water and shadows; heavy on GPU; iconic flagship shader.
- BSL Shaders — balanced: gorgeous visuals with performance options and color grading; excellent community favorite.
- Sildur’s Vibrant Shaders — multiple presets (Lite → Extreme); great for low and mid systems; colorful and saturated look.
- Continuum — photorealistic and cinematic; high system requirements; used for screenshots and cinematic builds.
- KUDA Shaders — cinematic colors and good reflections; smooth performance vs visuals balance.
- Chocapic13 — highly tunable, multiple profiles to choose; good for customizing performance/quality.
- ProjectLUMA — modern, performance-friendly, designed to work well with Iris + Sodium.
- Complementary / Modern Shaders — many community shaders focus on unique color palettes or low-spec performance.
Try the Lite or performance presets first if you’re not sure — they give a feel without crushing FPS.
Shader features explained (what each effect means)
- Global Illumination (GI) / Indirect lighting — subtle bounced light off surfaces.
- SSAO (Screen Space Ambient Occlusion) — deepens creases and corners for realistic contact shadows.
- Bloom — soft glow around bright areas.
- God Rays / Volumetric Lighting — visible light beams through fog/trees.
- Parallax Occlusion / Normal Mapping — surface detail on flat textures (gives depth illusion).
- Realistic Water — ripples, refraction, reflection, foam.
- Depth of Field — blurs distant or near objects for cinematic focus.
- Motion Blur — camera/turning smoothing, sometimes controversial for gameplay.
- Chromatic Aberration — color separation at edges (stylistic).
- Volumetric Clouds — thick, 3D cloud formations with shadows.
Not every shader does all effects; some prioritize style and performance.
Performance tips — get decent FPS with shaders
Shaders are demanding; here’s how to improve performance without losing the look:
- Use Iris + Sodium where possible; it often outperforms OptiFine while supporting shaders.
- Allocate more RAM to Minecraft (4–6 GB recommended if you use mods + shaders). In the launcher, go to Installations → More Options → JVM Arguments and set
-Xmx6G(for 6GB). Don’t allocate all system RAM. - Lower Render Distance (12–16 chunks is often a sweet spot).
- Use shader presets: low/medium/high; choose medium if unsure.
- Turn off or reduce Entity Shadows, Cloud Quality, Smooth Lighting in shader options.
- Disable fancy features (motion blur, depth of field) if you need FPS.
- Use performance mods: Lithium (tick optimizations), Phosphor (lighting), and FoamFix (memory).
- Update GPU drivers and use the GPU control panel to select high-performance profile for Java.
- Lower texture resolution by using lighter resource packs; high-res texture packs + shader = heavy load.
- Opt for lower post-processing resolution (some shaders allow rendering at lower internal resolution and upscaling).
- Use DLSS/FSR if your shader or driver stack supports it (some shader frameworks add support for upscaling technologies).
- Close background apps (Discord overlays, Chrome with many tabs, etc.)
Troubleshooting common shader problems
Black screen on shader load
- Update Java, GPU drivers.
- Try a different shader or lower preset.
- Check for mod conflicts (remove suspicious mods).
- Ensure OptiFine or Iris matches the Minecraft version.
Low FPS / stuttering
- Lower shader preset, reduce render distance, add performance mods.
- Allocate more RAM (but not too much).
- Turn off entities or clouds.
Crashes to launcher
- Check
latest.login.minecraft/logsfor error clues. - Remove the latest installed mod/shader and test.
- Ensure all mods and loader (Fabric/Forge) match Minecraft version.
Shaders menu missing
- OptiFine not installed correctly or using Fabric without Iris.
- For Fabric → ensure Iris is installed.
- For OptiFine → ensure you launched the OptiFine profile at least once.
Shaders look wrong or cause world glitches
- Some shader features assume certain resource pack formats; try switching to default textures.
- Certain mods change block models and may not work well with shaders.
Shaders + resource packs + mods — compatibility notes
- Resource packs (texture packs) can dramatically change the final look; high-res packs with shaders need more GPU memory.
- Mods that alter rendering or block models (e.g., some custom block mods) may conflict with shader features. If you see broken visuals, try vanilla textures or update the mod.
- OptiFine only features: Dynamic lights and some toggles exist only in OptiFine; Iris may implement some equivalents but not all. Decide which modstack works with your favorite shader.
Bedrock users — ray tracing & shader-like effects
- RTX ray tracing is the official route to photo-realism on Bedrock (Windows 10/11, select GPUs). It relies on resource packs built for ray tracing and an RTX-capable GPU.
- Non-RTX shader-like packs exist for Bedrock, but they’re limited compared to Java shader packs. If you have an NVIDIA RTX card and Bedrock on Windows, experiment with official RTX resource packs from the Marketplace or NVIDIA demos.
Best shader pack suggestions by use case
- Low-end PC / Chromebook (light shader feel): Sildur’s Lite, Chocapic13 Lite
- Balanced visual + performance: BSL Shaders, KUDA
- Cinematic / screenshots: Continuum, SEUS PTGI (path-traced SEUS)
- Performance + modern features (Iris): ProjectLUMA, Fabric-friendly shader packs
- RTX Bedrock: Official RTX resource packs from Marketplace
Legal & safety notes (important)
- Download shader packs from reputable sites — official shader author pages, CurseForge, GitHub, or the shader’s official website. Avoid random file-sharing sites full of ads.
- Do not run unknown installers or executables for shader packs; most shaders are
.zipfiles you place in theshaderpacksfolder. - Respect shader licenses and author credits. Many shader authors offer paid or donation options; supporting them keeps packs updated.
Creative uses & inspiration
- Use shaders for cinematic timelapses of building projects.
- Combine shaders with realistic texture packs to create photo-like screenshots.
- Use depth of field for showcase renders of builds.
- Record shader walkthroughs for YouTube or create ambient server spawn areas for dramatic entrances.
Frequently Asked Questions (Q&A)
Q: Do shaders work on Mac or Linux?
A: Yes — shaders run on Java Edition across platforms as long as GPU drivers and Java are compatible. Performance depends on hardware; Apple Silicon Macs need special setups.
Q: Will shaders break my Minecraft saves/worlds?
A: No — shaders are client-side visual changes. They don’t alter world data. Still, back up important worlds before major changes.
Q: Which is better: OptiFine or Iris + Sodium?
A: For pure compatibility and simplicity, OptiFine is great. For raw performance, Iris + Sodium (Fabric) often gives better FPS. Choose based on whether performance or ease of use is more important to you.
Q: Can I use shaders and ray tracing together?
A: Ray tracing is a GPU-level feature primarily on Bedrock with RTX hardware. Java shader packs and RTX are different systems; there are experimental ray-tracing style shader packs on Java, but official RTX is Bedrock-centric.
Q: My FPS tanks with shaders — how can I improve?
A: Lower shader preset, reduce render distance, use Sodium/Iris, allocate more RAM (carefully), use performance mods (Lithium/Phosphor), or choose a lighter shader pack.
Q: Are shaders safe to use with servers?
A: Yes — shaders are client-side visual changes and don’t interfere with server rules. Be mindful that some public servers may prohibit certain shaders for fairness (e.g., removing fog in PvP), but most allow them.
Q: Where should I download shaders?
A: Trusted sources: the shader author’s official page, CurseForge, GitHub, or well-known Minecraft mod sites. Avoid random ad-heavy download pages.
Minecraft Shaders can transform your experience from nostalgic blocks to a living, luminous world. Start with an easy shader (Sildur’s Lite or BSL medium), test performance, then tweak settings or try Iris + Sodium for better FPS. If you want cinematic screenshots, move up to SEUS or Continuum (but make sure your PC can handle it). No matter your rig, there’s a shader out there that fits your balance of beauty and playability.
🔥 Related Posts

Dinosaur Game — the complete fan’s guide (2025)

Epic Games Download: The Ultimate Guide for PC

Connections Hint Today January 5: Tips and Strategies for Mastering the NYT Game

Solitaire Quiz – Test Your Knowledge & Improve Your Card Game Skills (2025 Guide)

Call of Duty: The Legendary Gaming Saga Loved by France