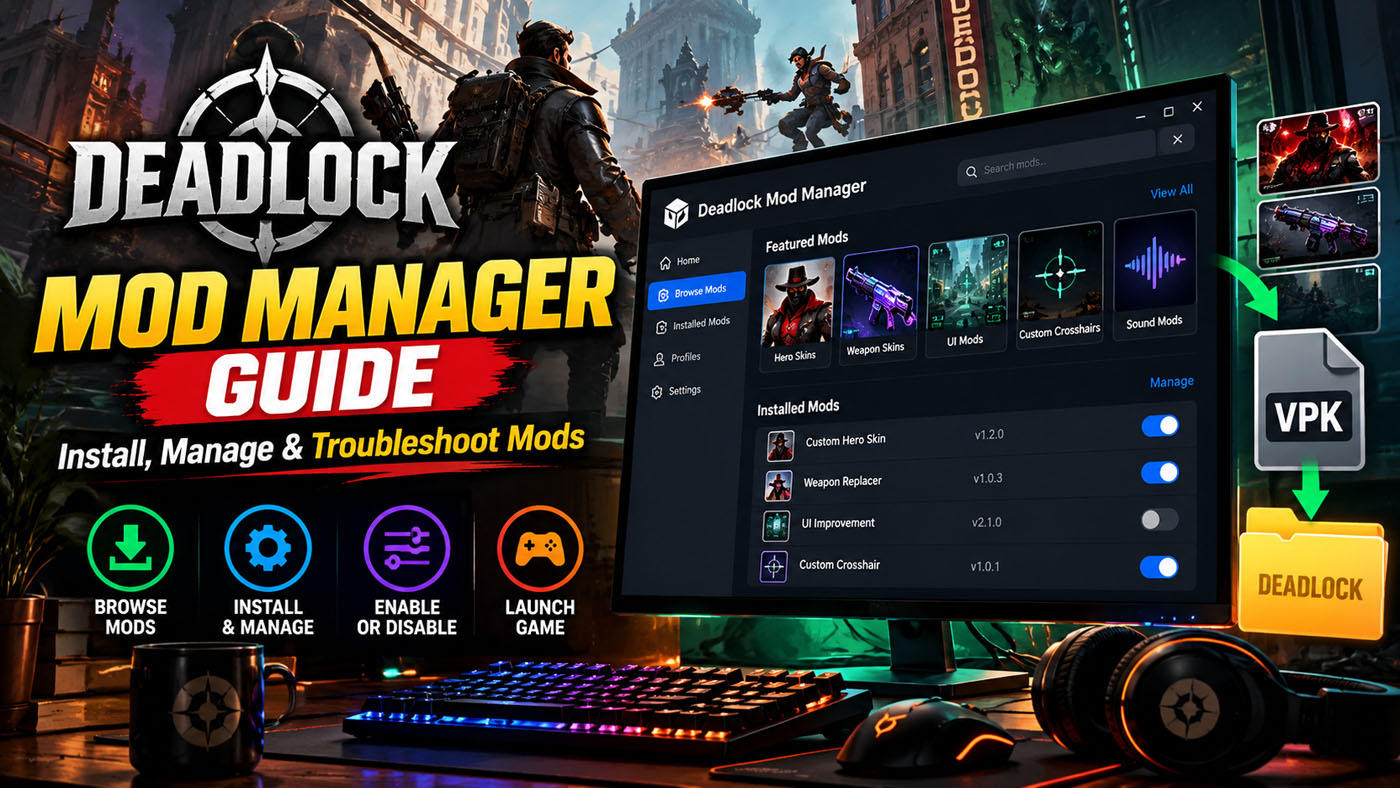
Installing a Deadlock skin manually is not especially difficult. Managing ten of them, remembering which files belong to which mod, fixing conflicts after an update, and returning the game to a clean state is where things become annoying.
That is the problem Deadlock Mod Manager is designed to solve.
It gives Deadlock players one desktop application for finding, installing, enabling, disabling, updating, and removing community mods instead of manually moving VPK files around the game directory.
The manager is free and open source, works on Windows and Linux, and pulls much of its community mod content from GameBanana. It is not an official Valve application.
For the manager itself, visit the official Deadlock Mod Manager website. For the game, use the official Deadlock page on Steam.
What Is Deadlock Mod Manager?
Deadlock Mod Manager is a third-party desktop application created specifically for Valve’s Deadlock.
Its main purpose is convenience.
Instead of downloading a mod, locating your Deadlock installation, finding the correct addons directory, copying files, and later trying to remember what you changed, the manager handles most of that process for you.
According to the project’s documentation, it can automatically detect your Deadlock installation. If automatic detection fails, you can manually select the game folder through Settings.
Deadlock Mod Manager at a Glance
| Feature | What It Does |
|---|---|
| Browse mods | Find community-created Deadlock mods |
| One-click installation | Downloads and installs compatible mods |
| Mods Library | Shows your installed mods |
| Enable/disable | Turns individual mods on or off |
| Mod updates | Checks supported mods for newer versions |
| Profiles | Keeps different mod setups separately |
| Vanilla launch | Lets you start Deadlock without active mods |
| Backups | Helps restore changes |
| Platforms | Windows and Linux |
| Price | Free |
| Source code | Open source |
The official project says the manager copies .vpk mod files into Deadlock’s addons folder rather than patching the game’s executable. It also provides backup and restore functionality.
Why Use a Mod Manager Instead of Installing Mods Manually?
If you only use one skin, manual installation may be perfectly manageable.
The advantages become clearer when you start experimenting with multiple mods.
Imagine installing separate skins, sound replacements, UI changes, crosshairs, and other custom files. If something suddenly stops working after a Deadlock update, troubleshooting every file manually can become tedious.
A mod manager gives you a central place to see what is installed.
You can disable one mod, test the game, enable another, or remove something without searching through several folders.
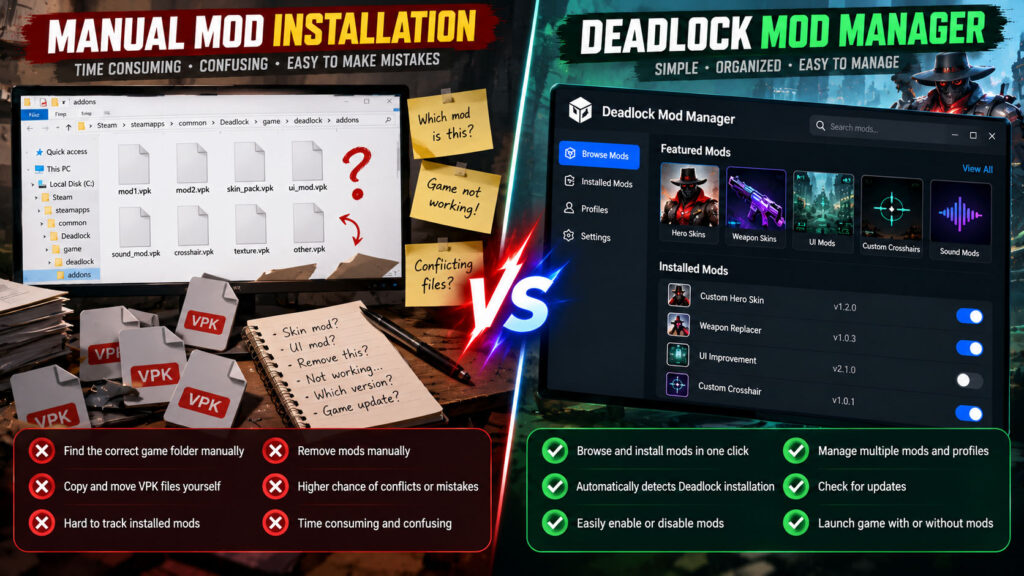
Manual Installation vs. Deadlock Mod Manager
| Task | Manual Method | Mod Manager |
|---|---|---|
| Find correct folder | You do it | Usually detected automatically |
| Install VPK files | Copy manually | Automated |
| Disable a mod | Remove/move files | Toggle it |
| Remove mods | Find files manually | Remove from library |
| Track updates | Check yourself | Update tools available |
| Multiple setups | Difficult | Profiles supported |
| Return to vanilla | Manual cleanup | Vanilla launch option |
| Resolve problems | More file management | Easier individual testing |
The manager is therefore less about making modding possible and more about making it manageable.
How to Install Deadlock Mod Manager
For most Windows users, installation is straightforward.
The project’s documentation currently recommends downloading the latest version from its website or GitHub releases. Windows installers and a portable executable are available, while Linux users have several package options.
Windows
A typical setup looks like this:
- Visit the official Deadlock Mod Manager website.
- Download the latest Windows installer.
- Run the installer.
- Open Deadlock Mod Manager.
- Allow it to detect your Deadlock installation.
- Confirm that the game path is correct.
- Finish the initial setup.
The documentation notes that Windows security prompts can sometimes appear, particularly with builds that are not recognized by SmartScreen. If you have concerns about a downloaded installer, verify that it came from the project’s official site or GitHub repository rather than an unrelated download page.
A portable Windows build is also available for players who would rather run the program without a traditional installation.
Linux and Steam Deck Support
Deadlock Mod Manager also supports Linux, although the developers describe Linux support as being provided on a best-effort basis.
Available installation methods currently include packages for Ubuntu/Debian, Flatpak, Arch Linux through the AUR, nixpkgs, and some additional community-maintained options.
Steam Deck users should be aware that Flatpak permissions can sometimes prevent the manager from accessing a Steam library. The project’s troubleshooting documentation includes filesystem-permission workarounds for this situation.
If you simply want the least complicated setup, Windows remains the easier route.
How to Install a Deadlock Mod
Once Deadlock Mod Manager is configured, installing a mod is much easier than doing it manually.
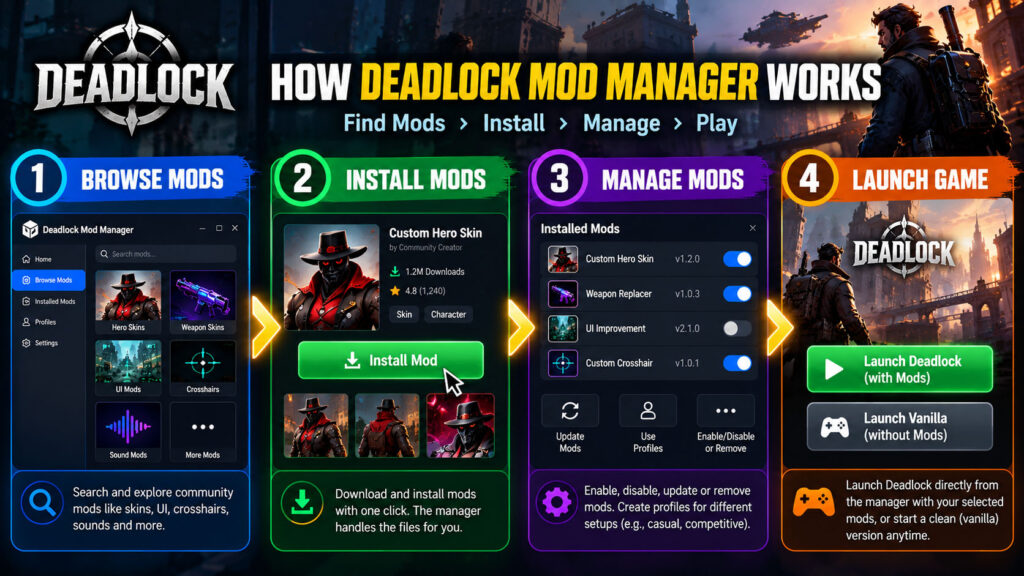
Open the mod browser or Mods Store, find something you want, and select the download option. The manager downloads the required files and places them where Deadlock expects them.
The basic workflow is:
- Open Mods Store.
- Search or browse for a mod.
- Read its description and compatibility information.
- Download the mod.
- Open Mods Library.
- Make sure the mod is enabled.
- Launch Deadlock through the appropriate modded launch option.
The project’s current website describes this as an automated process with no manual folder work required for normal installations.
Do not skip the mod description.
A mod can be available for download and still be outdated, incompatible with a recent game build, or dependent on another file.
What Kind of Mods Can You Find?
Most people searching for Deadlock Mod Manager are interested in cosmetic customization.
Community mod categories can include things such as:
- Character skins
- Model replacements
- Textures
- Sound modifications
- UI customization
- Crosshair configurations
- Visual tweaks
- Local or custom VPK mods
The manager’s current site includes a dedicated hero-skin system and a 3D preview for supported skins. It states that these skins are client-side, meaning other players continue to see the normal models and textures.
That distinction is important.
Changing how something looks on your computer is very different from installing software intended to give you information or competitive abilities that normal players do not have.
Is Deadlock Mod Manager Safe?
There are really two different questions here.
The first is whether the manager itself is transparent about what it changes.
The project is open source, and its website says the manager copies VPK files into the game’s addons folder, creates backups, does not patch the Deadlock executable, and lets users return to a vanilla setup.
The second question is whether every community mod you can install is automatically trustworthy or officially approved.
That answer is no.
The manager’s own FAQ recommends sticking to community mods you trust.
Also remember that Deadlock Mod Manager is not affiliated with Valve. Using a third-party mod manager should not be interpreted as Valve officially approving every mod available through it.
For a multiplayer game, that distinction matters.
Avoid anything that promises unfair gameplay advantages, hidden information, automation, cheating features, or similar competitive benefits.
Deadlock Is Still Changing
This is probably the most important thing to understand before modding Deadlock.
Valve still describes Deadlock as a multiplayer game in early development, with temporary art and experimental gameplay systems.
That means updates can change game files frequently.
A cosmetic mod that worked perfectly yesterday can suddenly stop loading after a patch.
That does not necessarily mean Deadlock Mod Manager is broken.
The mod itself may simply need to be updated.
What to Do When Mods Stop Working After an Update
Start simple.
Do not immediately reinstall everything.
The manager’s official troubleshooting documentation lists game-version compatibility, outdated mods, incorrect installation, and conflicts among the common reasons installed mods stop working.
A useful troubleshooting order is:
- Update Deadlock normally through Steam.
- Check Deadlock Mod Manager for updates.
- Check whether the affected mod has a newer version.
- Disable the problem mod.
- Launch the game without it.
- If the game works, re-enable mods one at a time.
- Reinstall the mod if necessary.
- Test for conflicts with other installed mods.
Installing mods one at a time while troubleshooting is much faster than changing five things simultaneously and trying to guess which one fixed the problem.
Profiles Are One of the Most Useful Features
If you regularly change mods, profiles are worth using.
Deadlock Mod Manager supports separate profiles with their own enabled mods, variants, and load order.
For example, you could have:
| Profile | Purpose |
|---|---|
| Vanilla-ish | Only a crosshair and minor UI customization |
| Skins | Your normal cosmetic setup |
| Testing | New or experimental mods |
| Friends | Same setup used by your group |
Profiles can also be shared using Profile IDs.
The manager does not upload your local VPK files into the profile itself. Instead, the shared profile describes the setup so the receiving player can obtain the referenced mods.
That is useful if several friends want to reproduce a similar mod configuration.
Can You Add Mods Manually?
Yes.
The Mods Library supports local mods, which can be useful when a mod is not being downloaded directly from the normal catalog.
However, there is an important limitation.
The documentation states that local mods are not automatically checked against GameBanana for updates unless they are associated with the appropriate source.
If you rely heavily on custom local files, keep your own backup copies.
Do not treat a mod manager as a substitute for backing up something you cannot easily download again.
Stable vs. Nightly Builds
Deadlock Mod Manager has Stable and Nightly update channels.
For most players, Stable is the sensible choice.
The project’s documentation describes Stable as the default and recommended channel. Nightly builds contain newer features and fixes but can also include unfinished or unstable changes.
Use Nightly when you specifically need a recent fix or want to test new functionality.
Otherwise, stay on Stable.
One warning from the developers is particularly worth following: do not run different versions of the manager against the same Deadlock installation at the same time.
Common Deadlock Mod Manager Problems
Deadlock Is Not Detected
Open Settings → Game and manually choose the Deadlock installation directory.
If Steam itself is installed in a nonstandard location or you use several Steam libraries, automatic detection may choose the wrong folder.
A Mod Is Installed but Does Nothing
Check:
- Whether the mod supports the current Deadlock version.
- Whether the mod needs an update.
- Whether another mod conflicts with it.
- Whether it is actually enabled.
- Whether its files were installed correctly.
The official troubleshooting guide recommends disabling other mods when testing conflicts.
Downloads Keep Failing
Network problems, firewall restrictions, or temporary server problems can interrupt downloads.
Try again later, check your firewall, and use the project’s troubleshooting documentation if the problem continues.
The Game Broke After Installing Several Mods
Disable everything and test Deadlock in a clean state.
Then enable mods individually until the problem returns.
This takes a little longer than randomly deleting files, but it gives you a much better chance of finding the actual cause.
Best Practices Before Modding Deadlock
A few habits can prevent most headaches:
- Download the manager only from its official website or GitHub repository.
- Read mod descriptions before installing.
- Check the date and compatibility notes.
- Avoid suspicious executables included with supposedly simple cosmetic mods.
- Keep experimental mods in a separate profile.
- Test new mods individually.
- Update mods after major Deadlock patches.
- Keep backups of custom or locally created mods.
- Use the vanilla launch option when troubleshooting.
- Never assume a third-party modification is officially approved by Valve.
That last point is especially important while Deadlock remains in active development.
🔥 Related Posts

How to Win More Clan Wars in Clash of Clans: The Ultimate Guide

World of Warcraft: An Epic Journey Through Azeroth and Beyond

Planet Minecraft — The Ultimate Guide for Creators & Players

Clash Royale Decks — The Ultimate 2025 Guide

Elden Ring Weapons: Best Picks for Every Playstyle