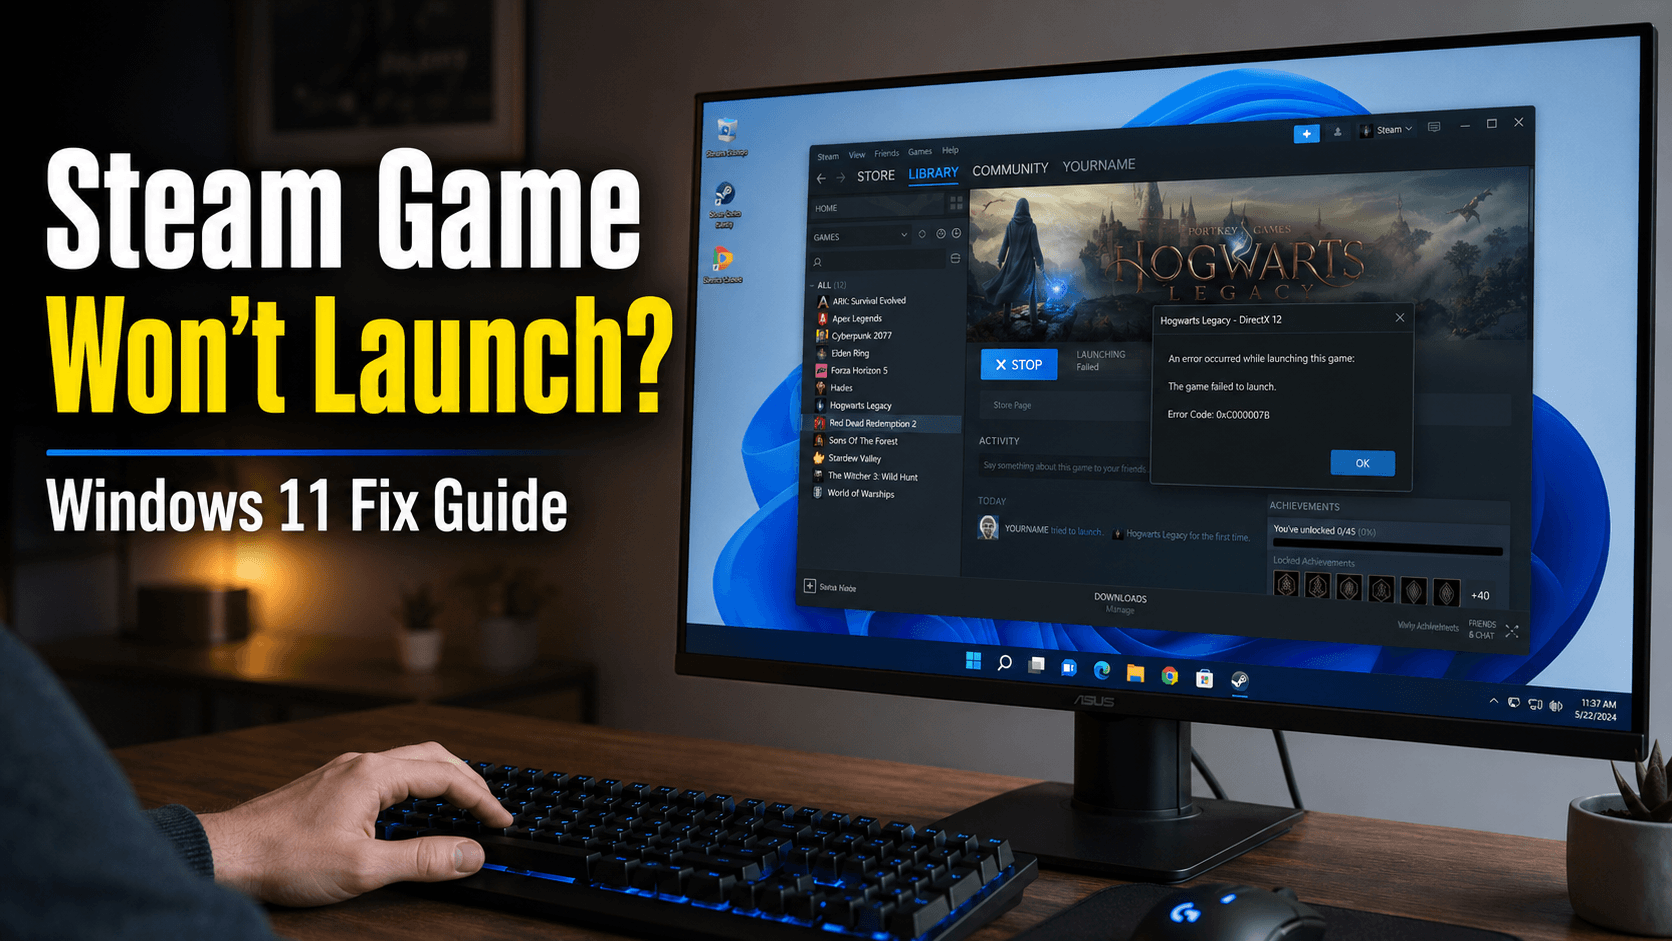
You click the green Play button, Steam shows the game as running for a few seconds, and then nothing happens. The button changes back to Play as though you never clicked it. In other cases, the game opens to a black screen, closes without an error, or stays hidden in the background.
This is a common Windows 11 gaming problem, and it does not always mean the game needs to be reinstalled. A Steam game may fail to launch because of damaged installation files, a stuck background process, outdated graphics drivers, conflicting overlays, missing Windows components, antivirus interference, mods, or a problem with the game’s launcher or anti-cheat software.
Start by restarting your computer, verifying the game files in Steam, and temporarily removing mods or custom launch commands. Those three steps solve a large number of startup problems. If the game still refuses to open, continue through the fixes below in order.
Before making changes, write down any error message you see. Even a short code or DLL filename can point directly to the cause. You should also avoid downloading individual DLL files from unofficial websites. A missing DLL usually means an official Microsoft runtime needs to be installed or repaired.
1. Completely Close Steam and Restart Your PC
A game may appear to be closed while part of it is still running in the background. This is especially common with games that use separate launchers, anti-cheat services, or cloud synchronization.
Start by closing Steam normally. Open Steam, click Steam in the upper-left corner, and choose Exit. Wait a few seconds before opening it again.
If Steam will not close or the game still appears to be running, press Ctrl + Shift + Esc to open Task Manager. Look for the game, Steam, the game’s launcher, or an anti-cheat process. Select any process that appears stuck and click End task.
Restart Windows 11 after closing those processes. A full restart clears temporary services and background tasks that may prevent the game from launching properly.
Once your PC starts again, open Steam and launch the game directly from your Library.
2. Verify the Game Files in Steam
One of the first things you should try is Steam’s built-in file verification tool. Game files can become damaged after an interrupted update, a system crash, a storage error, or an antivirus scan. A single missing or corrupted file may be enough to stop the game from opening.
Open Steam and go to your Library. Right-click the game that will not launch, select Properties, and open the Installed Files section. Click Verify integrity of game files and allow Steam to finish checking the installation.
Steam will compare the installed files with the correct versions on its servers. If anything is missing or damaged, Steam will download a replacement automatically.
The process may take several minutes for a large game. Let it finish completely before clicking Play again.
Keep in mind that verification can replace files changed by mods. Back up any custom files you want to keep before running the check. Steam also provides an official guide to verifying game files.
3. Remove Custom Launch Options and Disable Mods
Launch options can be useful when troubleshooting graphics or display problems, but an outdated or incorrect command can also prevent a game from starting.
To check your launch options, right-click the game in Steam, select Properties, and stay on the General page. Find the Launch Options box and remove anything written inside it. Close the Properties window and try the game again.
Commands such as -windowed, -dx11, -dx12, or -safe do not work with every game. A command that helps one title may cause another title to crash before the opening screen appears.
Mods are another common cause, particularly when the game stopped launching after an update. Temporarily disable Steam Workshop mods, script extenders, ReShade, unofficial patches, mod-manager profiles, and manually installed DLL files.
Do not assume a mod is compatible simply because it worked before. When a game receives an update, older mods may attempt to load files or code that no longer exists.
Try opening the game without any modifications. If it launches normally, enable your mods one at a time until you find the one causing the problem.
4. Open the Game’s EXE File Directly
Steam sometimes hides useful startup errors. Opening the game’s executable file directly may reveal an error message that does not appear when you click Play through the Steam client.
Right-click the game in your Steam Library, select Manage, and choose Browse local files. This opens the game’s installation folder in File Explorer.
Look for the main application file, which normally ends in .exe, and double-click it.
Pay close attention to any message that appears. An error mentioning VCRUNTIME, MSVCP, or MSVCR usually points to a Microsoft Visual C++ runtime problem. A DirectX error may indicate a missing legacy DirectX component or a graphics-driver issue. A message involving Easy Anti-Cheat, BattlEye, or another service means that component may need to be repaired.
Some games must be launched through Steam, so you may see a message stating that Steam needs to be running. That message is normal. The purpose of opening the EXE directly is to uncover a more specific error.
Do not search for and download a single missing DLL from a random website. Install the official Microsoft package that includes the missing file instead.
5. Install Windows 11 Updates
Windows updates can include compatibility improvements, security fixes, drivers, and system components used by PC games.
Open the Windows 11 Settings app by pressing Windows key + I. Select Windows Update, click Check for updates, and install any available updates. Restart your computer afterward, even when Windows does not immediately ask you to do so.
Also check the Advanced options section for optional driver updates. However, the newest graphics driver is usually better downloaded directly from NVIDIA, AMD, Intel, or your laptop manufacturer.
If the game stopped working immediately after a Windows update, make a note of the update date. The update may have changed a driver, security setting, or system component. Installing later updates may resolve the issue, but the timing can also help when searching the game developer’s support page.
Microsoft provides additional information in its official Windows Update FAQ.
6. Update Your Graphics Driver
A Steam game can close during startup when the graphics driver is outdated, damaged, or incompatible with the current game version. In many cases, the crash happens before the game can display an error.
Download the latest appropriate driver from your GPU manufacturer’s official support page:
Intel Driver & Support Assistant
After installing the driver, restart your PC before testing the game.
Gaming laptop owners should also check the laptop manufacturer’s support page. Some laptops use customized drivers or switch between integrated and dedicated graphics. A driver supplied by Dell, HP, Lenovo, ASUS, Acer, MSI, or another manufacturer may be more stable for that specific model.
If the problem started immediately after a graphics-driver update, the newest version may be the cause. In that situation, installing an earlier stable version from the GPU manufacturer can be worth trying.
7. Close Overlays and Hardware Monitoring Programs
Overlays add features such as recording, chat, frame-rate counters, and performance information. They usually work without problems, but they can conflict with certain graphics engines or anti-cheat systems.
Start by disabling Steam Overlay for the affected game. Right-click the game in your Library, select Properties, open the General section, and turn off Enable the Steam Overlay while in-game.
You should also temporarily close Discord Overlay, Xbox Game Bar, NVIDIA Overlay, AMD recording tools, MSI Afterburner, RivaTuner Statistics Server, third-party FPS counters, screen-recording software, RGB-control programs, and controller-mapping tools.
Try launching the game after those programs are closed. If it opens, turn the programs back on one at a time. This helps identify the exact conflict instead of leaving every feature disabled permanently.
Older games and games with strict anti-cheat systems are more likely to experience overlay conflicts.
8. Check Windows Security and Antivirus History
Windows Security or another antivirus program may block a game executable, launcher, mod file, or anti-cheat component. This sometimes happens immediately after a game update because the executable has changed.
Open Windows Security, select Virus & threat protection, and open Protection history. Look for an action involving the game’s installation folder, its launcher, or one of its supporting files.
Read the detection details carefully before restoring anything. Only restore a file when the game came from a trusted source and you have confirmed that the file belongs to the legitimate installation.
You may need to add an exclusion for the specific game folder, but avoid excluding an entire drive. A narrow exclusion reduces the security risk. Microsoft explains how exclusions work in its Windows Security exclusion guide.
Do not permanently disable your antivirus. Turning off all protection may make it easier for malware to run and usually does not address the real cause of the launch problem.
If you use third-party antivirus software, open that program and review its quarantine, blocked-app list, and recent security events.
9. Repair Microsoft Visual C++ and DirectX
Many PC games depend on Microsoft Visual C++ and DirectX components. When one of these packages is missing or damaged, the game may close immediately after you click Play.
Microsoft Visual C++ errors often include filenames containing VCRUNTIME, MSVCP, or MSVCR. Download the supported packages from Microsoft’s official Visual C++ Redistributable page.
Install or repair both the x64 and x86 versions unless the game developer provides different instructions. Even on a 64-bit Windows 11 system, an older 32-bit game may still require the x86 package.
Windows 11 already includes modern DirectX support, but older games may rely on legacy DirectX files. In that case, use Microsoft’s official DirectX End-User Runtime installer.
Many Steam games also include the required installers in their own folders. Open the game’s installation folder and look for directories named _CommonRedist, Redist, or Support. You may find official DirectX and Visual C++ setup files there.
Restart your computer after installing or repairing these components.
10. Repair the Game Launcher or Anti-Cheat Service
Some Steam games use a second launcher from companies such as Rockstar Games, Ubisoft, Electronic Arts, or another publisher. Other games require anti-cheat services such as Easy Anti-Cheat or BattlEye.
If that secondary component fails, Steam may briefly show the game as running and then return to the Play button.
Start by verifying the game files. Then restart your computer and open the game’s installation folder. Look for an anti-cheat installer or repair tool. The exact filename varies, but it is often located in a folder named after the anti-cheat service.
Run the official setup program and select Repair when that option is available.
For games that use a publisher launcher, open the launcher separately and sign in. Check whether the launcher needs an update or is displaying an account-related error. Then close it and try opening the game through Steam again.
Steam and the secondary launcher should normally run with the same permission level. Problems can occur when one program is running as an administrator and the other is not.
11. Reset Administrator and Compatibility Settings
Many troubleshooting guides recommend running every game as an administrator. That may help diagnose a permissions issue, but it is not always a good permanent solution.
Open the game’s installation folder, right-click the main EXE file, and select Properties. Open the Compatibility tab.
If Run this program as an administrator is already selected, clear it and test the game. You should also clear compatibility mode unless the game developer specifically recommends using it.
Older games may work better with Windows compatibility mode, but test it only after the normal settings fail. Select one Windows version, apply the change, and try launching the game. If there is no improvement, turn compatibility mode off again.
Avoid changing several compatibility settings at the same time. When multiple options are changed together, it becomes difficult to know which one helped or caused another problem.
You can test administrator mode temporarily by right-clicking the EXE file and choosing Run as administrator. If that makes the game open, the installation may have a folder-permission problem. It is better to correct that underlying issue than to leave elevated access enabled forever.
12. Reset the Game’s Configuration Files
A game can stop launching because of a bad resolution, unsupported graphics setting, damaged configuration file, or incorrect monitor assignment. This often causes a black screen or an immediate crash after the startup logo.
Game settings are commonly stored in the Documents folder, %LOCALAPPDATA%, %APPDATA%, or the game’s installation folder.
Press Windows key + R, type %LOCALAPPDATA%, and press Enter. Look for a folder named after the game or its publisher. You can repeat the process with %APPDATA%.
Before changing anything, back up the folder. Configuration directories sometimes contain local save files in addition to graphics and control settings.
Instead of deleting the folder, rename it. For example, change GameName to GameName.backup. The next time the game launches, it should create a fresh configuration folder with default settings.
If the game opens afterward, one of the old settings was likely damaged or unsupported. You can then restore saved games carefully without copying the broken configuration files back into place.
Do not assume Steam Cloud protects every file. Some games synchronize saves but not graphics settings, while others do not support cloud saves at all.
13. Repair the Steam Library and Clear the Download Cache
The game files may be correct while the Steam Library folder or download cache is experiencing a problem.
Open Steam Settings and select Storage. Choose the drive containing the game and open the library options menu. If Repair Folder is available, select it and allow Steam to complete the process.
You can also clear Steam’s download cache. Open Steam Settings, select Downloads, and click Clear Download Cache. Steam will restart and may ask you to sign in again.
Clearing the download cache does not uninstall your games. It removes temporary download data that may interfere with updates, installations, or file verification.
Make sure you know your Steam account password before clearing the cache.
14. Repair Windows System Files
When several Steam games or other Windows programs are failing, the problem may be connected to damaged Windows system files rather than one specific game.
Windows 11 includes two tools that can repair system components: DISM and System File Checker.
Right-click the Start button and open Terminal (Admin). Enter the following command and press Enter:
DISM.exe /Online /Cleanup-image /RestorehealthWait for the process to finish. It may appear to pause at certain percentages, so do not close the window early.
After DISM completes, enter:
sfc /scannowRestart your computer after the scan finishes, then try the game again.
Microsoft recommends running DISM before System File Checker. The company provides more details in its official Windows system-file repair guide.
Reinstall the Game as a Last Resort
Reinstalling can help when the game installation is badly damaged, but it should not be your first step. File verification is faster and often solves the same problem without requiring a large download.
Before uninstalling, confirm where the game stores its saved data. Check whether it supports Steam Cloud, and back up local saves, screenshots, custom maps, and configuration files.
Right-click the game in Steam, select Manage, and choose Uninstall. Restart your computer after the removal is complete.
Check the old installation folder before reinstalling. Steam may leave unofficial mods, custom DLL files, and other manually added content behind. Back up anything important, then remove leftover modification files.
Reinstall the game and launch it before restoring mods. A clean installation may begin crashing again immediately if the same incompatible files are copied back into the folder.
Reinstalling the entire Steam client is normally unnecessary when only one game is affected. Consider reinstalling Steam only when several games fail, the Steam client crashes, or Library and download features are also broken.
Check Windows Reliability Monitor for Crash Details
When the game still will not start, Windows Reliability Monitor may provide information about the crash.
Open the Start menu and search for View reliability history. Open the result and look for a red failure symbol at the time the game stopped working. Select the failure and click View technical details.
The report may show the faulting application, faulting module, exception code, or application path. This information does not always identify the exact cause, but it gives you something specific to research or send to the game’s support team.
For example, a repeated fault involving a graphics-related module may support the possibility of a driver problem. A crash involving the game launcher may point toward a damaged launcher installation.
Avoid assuming that the module named in the report is automatically responsible. It may simply have been active when another part of the game failed.
How to Tell Whether the Problem Is Steam or the Game
When only one game refuses to launch, the cause is usually connected to that game’s files, mods, settings, launcher, runtime requirements, or anti-cheat installation.
When several Steam games fail at the same time, the problem is more likely to involve Steam, Windows, a graphics driver, security software, or the storage drive.
You can also try launching a small game that previously worked. If it opens normally, Steam itself is probably functioning. Focus on the installation and requirements of the affected game.
If every game fails after the same Windows or graphics-driver update, investigate that shared change first.
When to Contact the Game Developer
Contact the game’s official support team when the problem affects only that title and the general Windows and Steam fixes have not helped.
Include the exact error message, your Windows 11 version, your graphics card, your driver version, and a description of what happens after you click Play. Mention whether the game uses mods and list the troubleshooting steps you have already tried.
A screenshot of the error and the details from Windows Reliability Monitor can make the support request much more useful.
You should also check the game’s official announcements, Steam Community page, or support site when the problem began immediately after a game update. A widespread startup issue may require a patch from the developer rather than another change to your PC.
🔥 Related Posts

New York Times Sudoku: Your Ultimate Guide to the Daily Number Puzzle

Xbox Game Pass Ultimate: Is It Still Worth It for US Gamers?
Are Mod APKs Safe to Use in 2025? A Complete Guide

Apex Legends Characters: A Complete Guide (2025 Edition)

CardGames.io Games: What You Can Play, How It Works, and the Best Games to Try